
Three Easterween Crafts to spruce up your goth basket this year!
These crafts make great basket additions when you are making a basket for your goth kids, or just decorating your home!
Why use Spooky Cat Press paper for your crafts? Our gothic gift wrap sheets have a satin-finish and are printed in small batches with a “mom and pop” shop in California. The premium, heavy-weight paper is perfect for crafts and scrap-booking projects. Each sheet measures 20 x29 inches, enough to wrap a medium-sized box or work on several small crafts.
First Craft: Coffin Boxes!

✂ Materials you will need for your first craft, Coffin box for your Easterween Basket:
- Gothic Spooky Cat Press Paper (the paper I am using is linked below!)
- A Pen
- Tape
Step 0: The Pattern
Here is the pattern we are using to cut out the coffin top and bottom.
Print it to whatever size you want your coffin, and then cut out the pattern.

Step 2 and 3: Fold and Tape your Coffin

2) Fold the flaps of the coffin in.
3)Tape on the inside of all the flaps to tape your coffin together.
Please repeat this step on both the top and the bottom of your box.
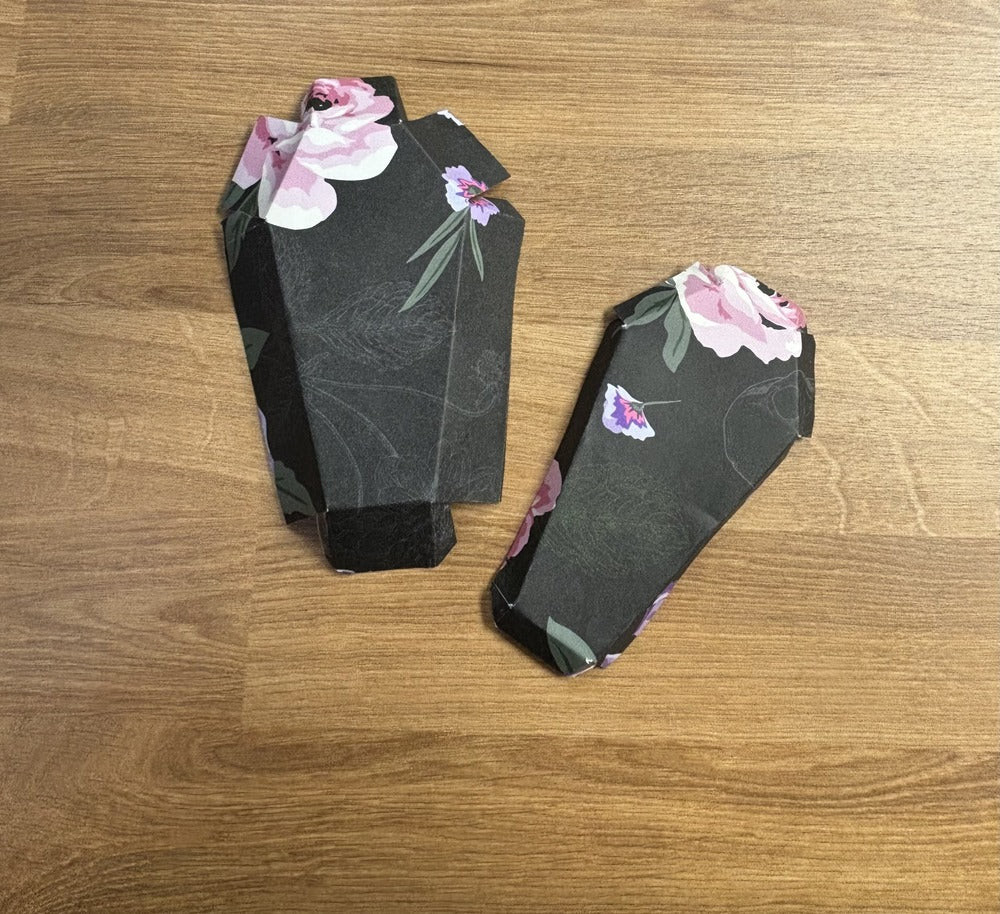
Step 4: Done!
And here is your finished Coffin Box! You can use this
to put some extra chocolate treats in your goth kids Easterween basket, or for some other spooky gift.

Second Craft: Bunny Heads!

✂ Materials you will need for your first craft, Bunny Heads:
- Gothic Spooky Cat Press Paper (the paper I am using is linked below!)
- A Pen
Optional: - Tape!
Steps 1-6: Folding!
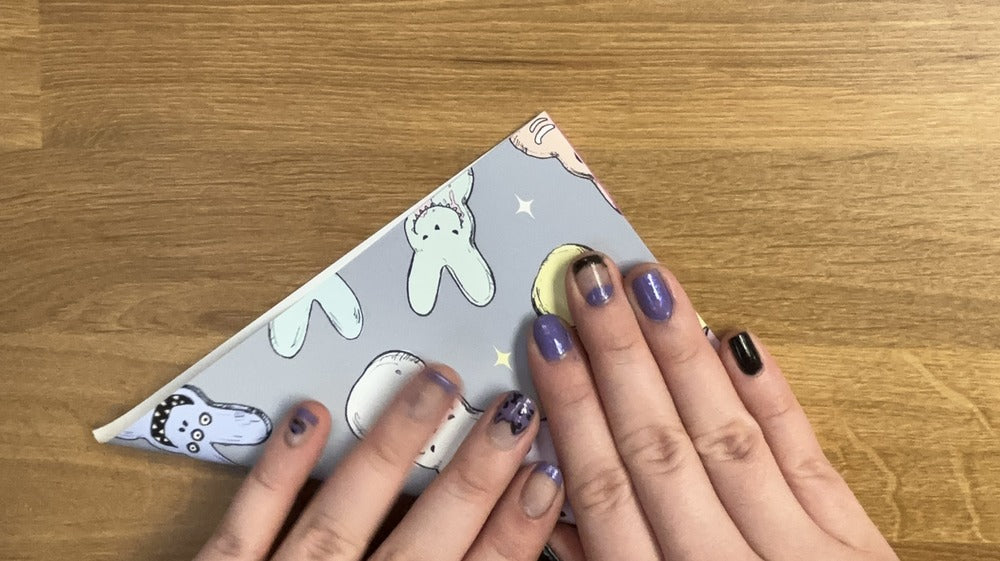


1) Fold the 7 inches x 7 inches square you have in half, corner to corner. (First picture)
2) Fold the bottom of the triangle up, to the thickness that you want the ears, we did just under an inch. (Second picture)
3) Fold the triangle you have in half down the middle, and then unfold. (Third picture)
4) Fold the bottom up towards the middle line that you made, and then do that on the opposite side. (Forth picture)
5) Fold up the bottom point, for the bottom of the rabbit head. (Fifth picture)
6) Fold in the points on the left and right sides of the face, but leave a bit of an angle between the side and the bottom. (Sixth picture)
Steps 7-11: Finishing steps!
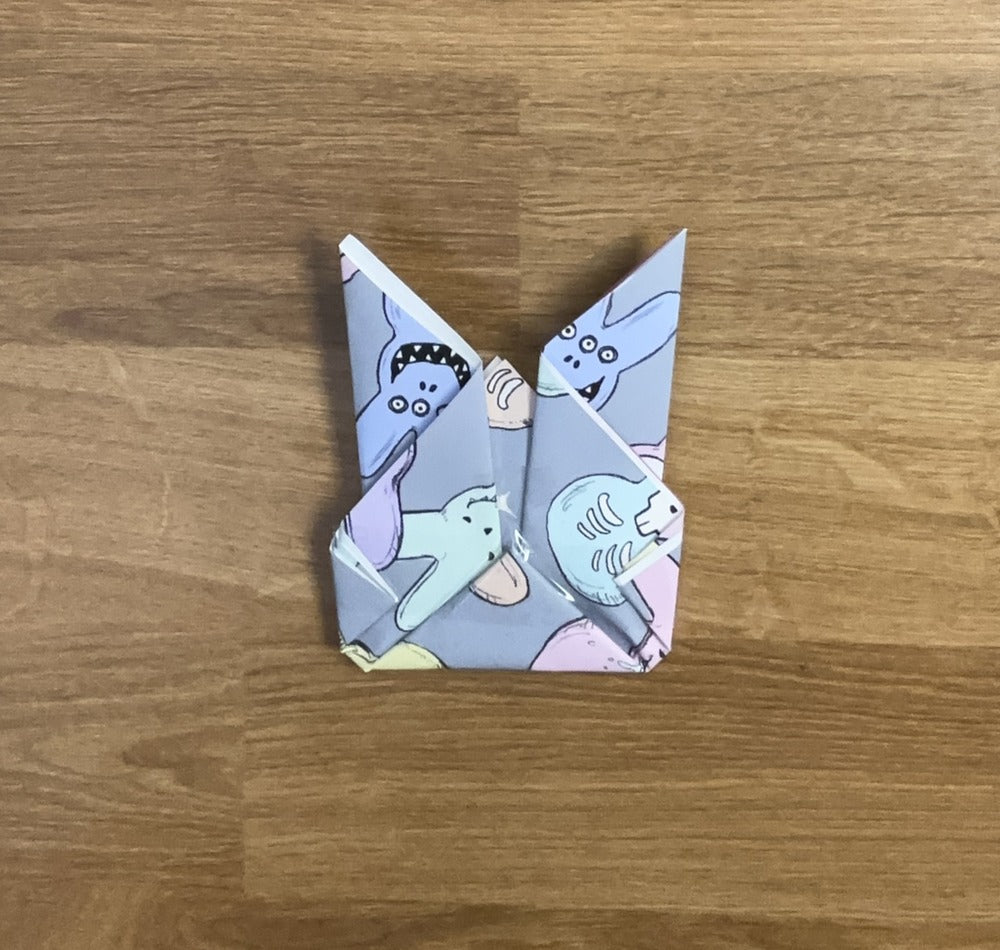


7) Optional step: Tape down the back folds so that the head is flatter for future steps. (First picture)
8) Fold the tips of the ears backwards to make them more rabbit shaped. (Second picture)
9) Flip to the front of the bunny. (Third picture)
10) Fold the triangle on top of the bunny head behind the front of the face, in between the face and the ears. (Forth picture)
11) Draw out the eyes and mouth. (Fifth picture)
Step 12: Done!
After the face is drawn, you are done! You can put this bunny head in your bat-sket or you can make several of them and make bunting to decorate your home!

Third Craft: Paper Cranes!

✂ Materials you will need for your first craft, Paper Cranes:
- Gothic Spooky Cat Press Paper, pre-cut to a square (the paper I am using is linked below!)
Steps 1-7: How to fold!
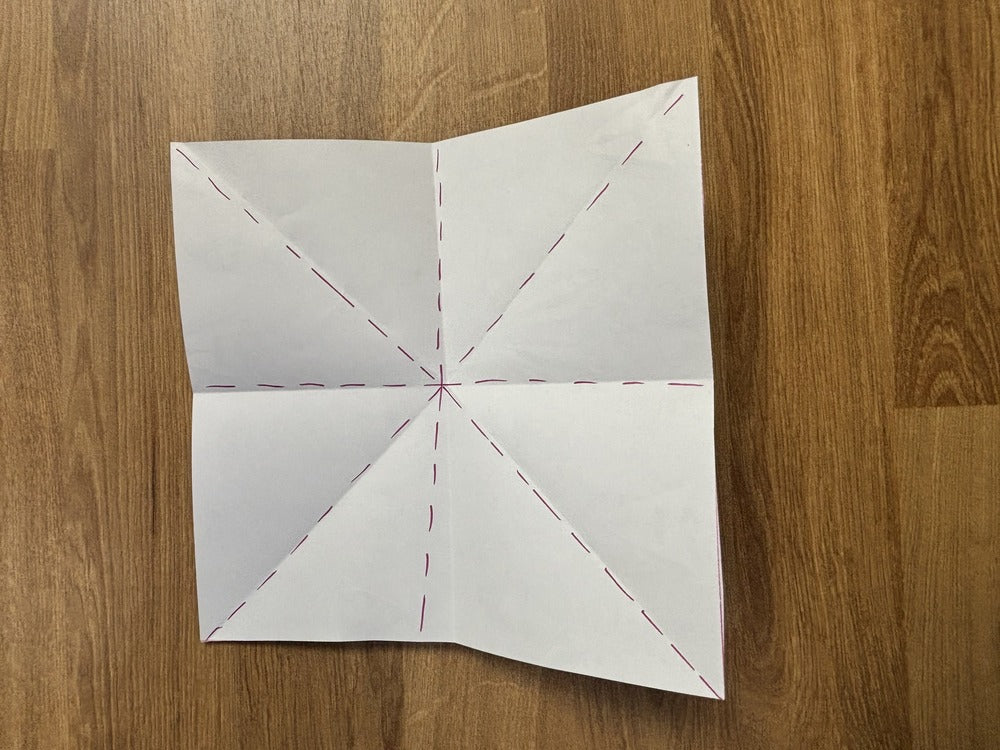


1) A paper folded in half both ways and then corner to corner both ways. (First picture)
2) Fold the paper corner to corner the other direction. (Second picture)
3) Fold the square into itself and into a smaller square with the flaps inside. (Third picture)
4) Fold the flaps in towards the center, on the front and back. (Forth and fifth pictures)
5) Top of the triangle folded in over the flaps. (Sixth picture)
6) Unfold everything and fold the two outside edges in towards the center. (Seventh picture)
7) Flatten the top backwards, and repeat on the other side. (Eighth photo)
Steps 8-11 More Folding!


8) Fold the outside edges in towards the center again, on both sides. (First picture)
9) Invert the thin side up for the head of the crane. (Second picture)
10) Invert the end of the neck again to make the head of the crane. (Third picture)
11) Invert the other side to make the tail of the crane. (Forth picture)
Step 12: Done!
All you have to do now is fold down the wings and then pull them out a bit, and you are done! You can use these as filler for your spooky baskets, or hang it up! We used ours as bunting in front of the fireplace in our Easterween room!

Remember to show us your Easterween Crafts, and how you incorporated them into your baskets or homes! Hope you enjoyed these delightfully macabre crafts!